Tutorial: Using scExtract to generate single-cell skin atlas from published data
In this tutorial, we will demonstrate how to use scExtract to generate a single-cell skin atlas from published data.
scExtract setup and configuration
First, we need to install scExtract and configure the API key as described in the Installation and Usage sections.
Metadata extraction
Then, we will find some published article that contains single-cell RNA-seq data related to our topic of interest. You can download the PDF file and save it in the pdfs folder.
Next, we will run the following command to extract the metadata from the PDF file, add -s create project structure:
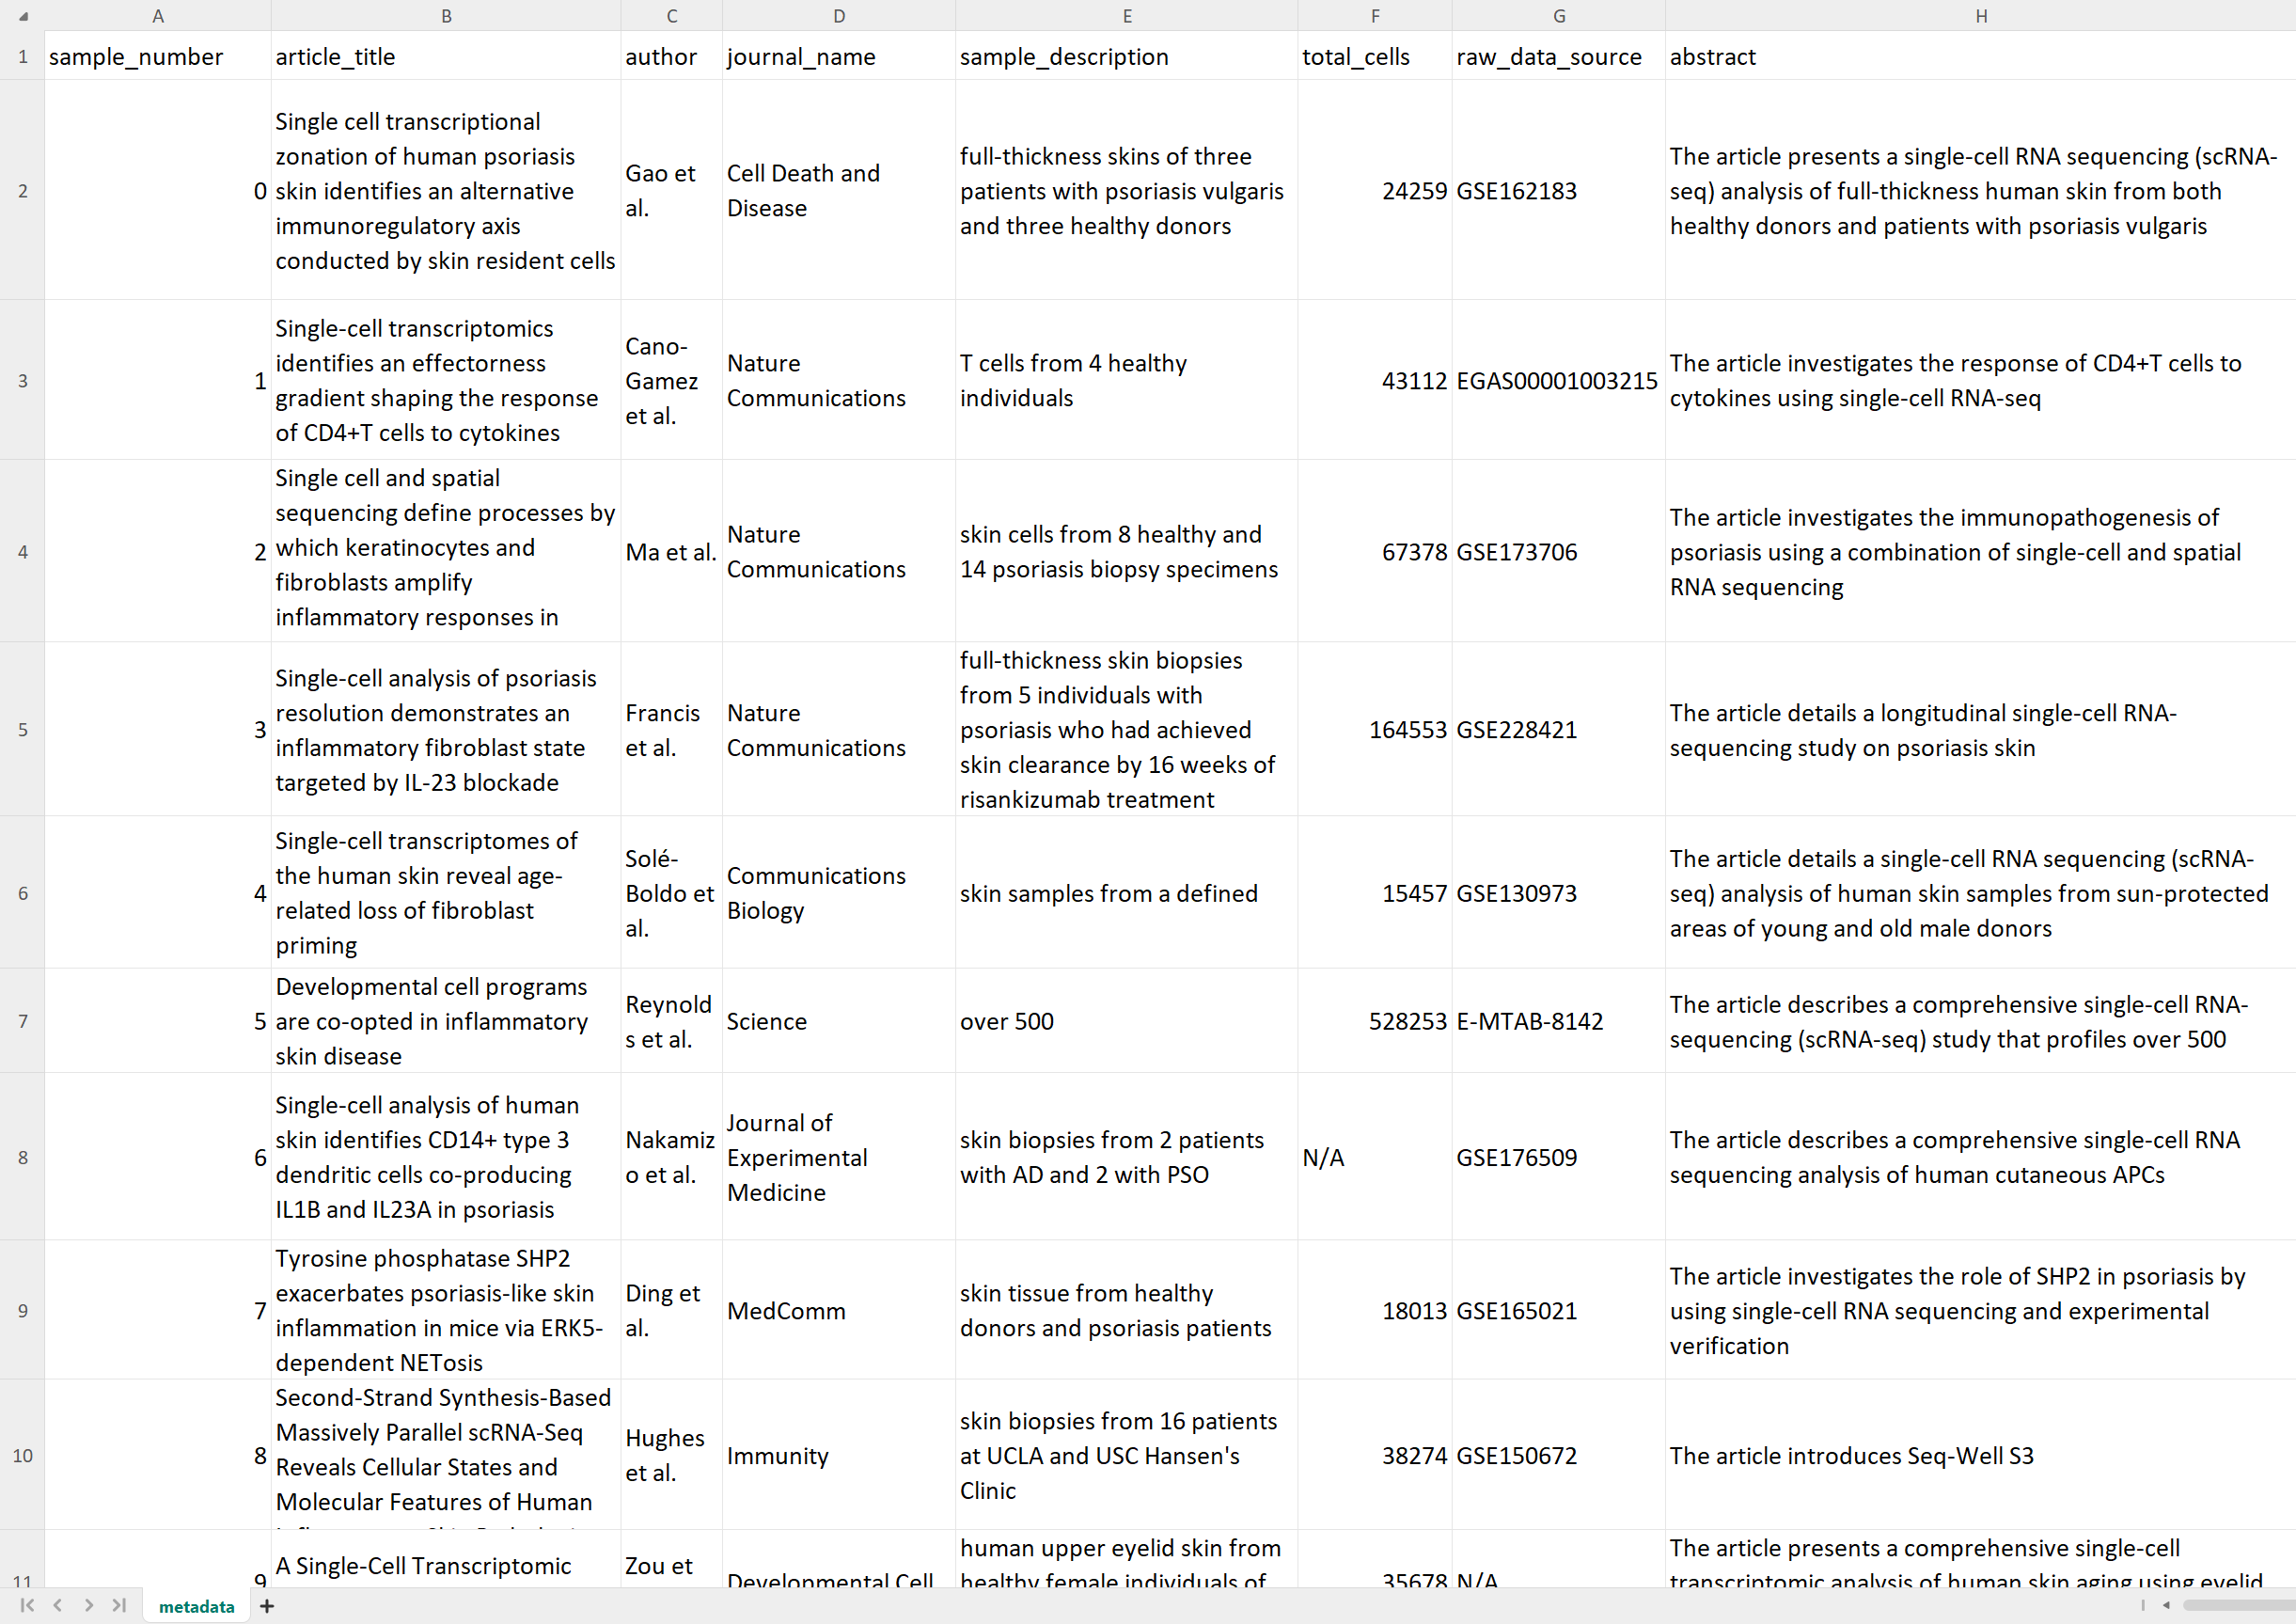
scExtract get_metadata -i pdfs/*.pdf -o metadata.csv -s
After that, we will get the metadata in the metadata.csv file, which contains information such as authors,
title, abstract, cell count per dataset, dataset location, and other details. Meanwhile, directories named after the
sample_id will be created in the current working directory to store subsequent data processing results.
Raw data download and processing
Next, we need to manually download each dataset. We can exclude datasets that are difficult to access or require mapping, and it’s recommended to focus on GSE datasets only.
Using sample0 as an example, after downloading, place it in the sample0/raw_data directory. Then use sc.read_text() directly to read the dataset.
It’s important to note that we need to add a Batch column to adata.obs for subsequent batch effect correction. It’s also recommended to add a Disease column
for cell type annotation across different diseases. To ensure accuracy, this step requires manual input, but we have prepared comprehensive notebooks to help you complete this step,
please refer to Notebooks for Preprocessing GSE Data.
data.obs['Batch'] = data.obs.index.str.split('_').str[0]
data.obs['Disease'] = data.obs['Batch'].str[:-1]
Then store it in the raw_data/sample0_raw.h5ad file.
Integration
One-step integration
Next, we can run the auto_integrate.smk script in scExtract/Snakemake to batch process automatic datasets.
Remember to install prior-aware integration optional dependencies as described in the Installation section
First, place the script and config file in the project root directory, then rename config_sample.yaml to config.yaml,
and modify project directory and other information in the config file:
project_dir: /home/wu/projects/scExtract # project directory
init_config_ini: config.ini
output_suffix: claude3 # custom suffix

debug: False
applied_files: all

# Step 1: Auto extract
config_pkl: config.pkl
log_file: auto_extract.log

# Step 2: Add embedding
AddEmbedding.user_dataset: # you can add your own dataset here. Note that the dataset should also contain `Batch` and `Disease` columns
                           # and the cell type annotation should be specified `cell_type` column

# Step 3: Integration
method: scExtract
Finally, run the following command:
snakemake -s auto_integrate.smk
By default, individual datasets will be downsampled in a hierarchical and desenty-based manner, and then integrated. If you are confident in memory usage,
you can remove the --downsample option in the Integrate rule.
If you don’t want to bother with prior-aware integration, you can set the method to cellhint to use the original CellHint method.
Step-wise integration
Step 1: Auto extract
If you want to integrate datasets on High-Performance Computing (HPC) clusters, you can use the step-wise integration method.
Use rule AddEmbedding and Integrate_Input instead of the Integrate rule in the auto_integrate.smk script.
This will process each dataset and generate the merged embedding dictionary in the output directory.
ls integrated_input_claude3_5/

# Output
claude3_5_embedding_dict.pkl
sample{i}_claude3_5_extracted.h5ad
Step 2: Integration
After generating the merged embedding dictionary, we upload the dictionary and the extracted data to the HPC cluster. Then run the following command:
scExtract integrate -f *.h5ad -m cellhint_prior \
    --embedding_dict_path claude3_5_embedding_dict.pkl --output_path integrate_output_tmp.h5ad
This step will correct mis-annotations, so we need to generate new annotations embeddings with internet again using:
scExtract extract_celltype_embedding -f integrate_output_tmp.h5ad --cell_type_column cell_type \
    --output_embedding_pkl harmonized_embedding_dict.pkl
Finally, we can run the second turn integration to generate the final integrated dataset:
scExtract integrate -f integrate_output_tmp.h5ad -m scanorama_prior \
    --embedding_dict_path harmonized_embedding_dict.pkl --output_path integrate_output.h5ad